Showing posts with label crafts. Show all posts

Friday, February 15, 2013

Super stacked bow tutorial-part 1

You know those gigantic boutique hair bows? The ones you could easily spend a small fortune on? I'm going to show you how to make them! With just a little practice, you can fold bows like a pro. They make great gifts, and it's very handy to be able to whip up a bow to match an outfit before pictures or another big event since custom bows can take a lot of time.

This bow has 5 layers, and I'll show you how to make each of them separately then how to put it together. You can rearrange, resize, and add or remove layers to make this bow your own. I'd love to see your creations!

The layers (from bottom to top): large boutique bow made with 1 1/2 in. ribbon, spikes, larger loop bow, slightly smaller loop bow, medium boutique bow made with 5/8 in. ribbon

To create the large boutique bow:

You will need 1 1/2 in. grosgrain ribbon, needle and thread (I used all purpose polyester thread, two strands), scissors, and a pin.

Cut your 1 1/2 in. ribbon 30 in. long. Heat seal the ends. Lay the ribbon out along side some measuring implement (tape, ruler, whatever you have handy) with the front side down.

Measure out 5 in. and fold that 5 in. over the remaining ribbon. Fold the other end over at the 6 in. mark. Continue wrapping the ribbon around until there are two loops and a tail at either end. It should come out perfect (Okay. You caught me. It probably won't be perfect, but it really doesn't matter much)!

Stick a pin right in the middle to hold the ribbon in place. I like to work on a surface that I can stick the pin directly into. A cutting mat would work great, but anything will do.

Take the outside ribbon loop on the right side and pull it up. Take the inside ribbon loop on the left side and pull it down. Pull the outside left ribbon loop up and the right inside ribbon loop down. Try to get the tails to line up. It should kind of look like a bow already.

Holding the loops in place, begin weaving your needle (pre threaded with a large knot tired at the end) from the bottom (the side closest to you) through the center of the bow, using your pin that should still be there as a guide. Continue weaving until you get to the top of the bow, removing the pin when you reach it.
Pinch the folds made by the weaving together, then pull the needle through until the knot is pulled tight against the bottom of the bow. Wrap the thread around the bow center three or four times then tie it off. You might want to trim the long tail that remains down to about 3/4 in. and re-seal the end.

Voila! You have made a boutique bow!

You'll need to make another with 21 inches of 5/8 in. ribbon to make the top layer of the super stacked bow. You'll fold at 3 inches first, then 4 (rather than 5 and 6), then complete the rest of the instructions. You can make a great bow just by stacking these two bows, but we're going to add more layers.

I'll try to get the rest of this project up tomorrow!

Sunday, February 10, 2013

Wide D-Ring Ribbon Belt

This project can be adjusted for little girls by using 1 1/2 in. ribbon instead of 2 in. ribbon.

You will need: 2 in. grosgrain ribbon (to get the measurement for your ribbon, measure your natural waist then add seven inches), two 7/8 in. d-rings (these can be found with the sewing notions), basic sewing implements

1. Heat seal the ends of your ribbon.

2.Put one end of your ribbon through both d-rings. You may have to accordion fold the ribbon to get it though neatly. Pull it through about 2 in. and fold it back against the length of the ribbon.

3. Sew across the two layers of ribbon about 1/2 in. down from the d-rings.

4. Reverse stitch back over the initial line of stitching. You'll see in the pictures that I used white thread with navy ribbon. You may want to use coordinating thread so that the stitching isn't so obvious.

5. Repeat steps 3 and 4, only about 1/4 in. further down. This second row of stitches will provide a more secure hold.

6. To wear the belt, wrap around the waist and pull the free end of the ribbon through both d-rings, then fold it back over and pull it back through the second d-ring until the belt is tight. It's made to be worn at the natural waist.

I love the gathering that you get using d-rings much smaller than the ribbon. If you prefer a straighter look, use larger d-rings.

Felt Heart Accents Tutorial

This is an easy 'from the couch' craft. You can add them as accents on paper Valentine's, in a scrapbook, glue them onto a ribbon-lined alligator clip, or use them as a bow center.

You will need: felt in the color of your choice, needle and hand embroidery thread

1. Cut two hearts from the felt, between 1 and 4 inches across. You could use a stencil or cut a half heart into felt folded in half, elementary school style. I used the old-school method. They need to be fairly close in size and shape, but no need to freak if they're not perfect.

2. Tie a knot at one end of a 2 ft length of embroidery thread.

3. Stack the two hearts, lining them up the best you can.

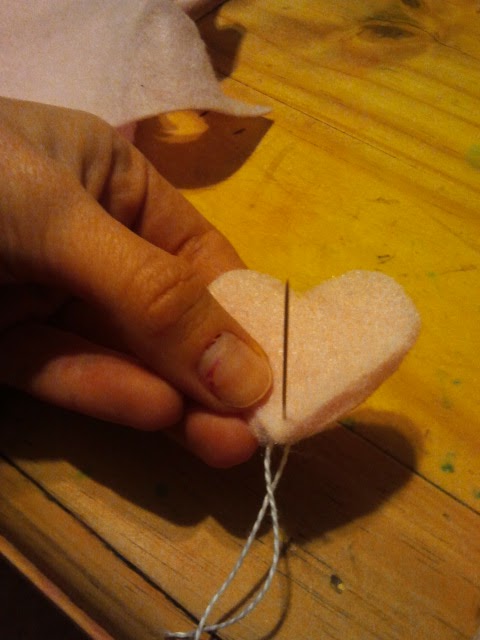
4. Hand sew about 1/8 in. in to the heart, going around the outside using medium sized stitches. If you stitch too small, the felt will tear rather than the stitching holding the two hearts together. Same goes for if you get too close to the edge.

5. When you've gone all the way around the edge of your heart, make sure the remaining thread is pulled through on the same side of the hearts as your initial knot. Knot the thread so your stitches don't come undone. Cut the excess thread.

Now, use your handmade embellishment however you see fit!

Wednesday, February 6, 2013

I'm Taylor, lovely to meet you!

Taylor here, beginning my adventures as a blogger. I've always loved to write, and I've always loved to craft. It finally hit me that I could combine the two, giving me a chance to do a little more of both.

I'm a sort-of stay at home mom, happily married with two girls (7 and 3) and a boy (4). As the blog title implies, I'm no super mom. I forget it's my kids' turn to bring snack more often than I remember, homework disappears into the abyss that is our home if it strays too far from the back pack where it lives, and I'm late a minimum of 20% of the time. These tendencies have made me into a master of improv.

I don't think I've mentioned yet that we live in a tiny, tiny house. I don't have a fancy craft room or even a kitchen table to work at. I have relegated a corner of the tiny closet in our bedroom for my craft supplies and, until I come up with a more acceptable solution, they live in two cardboard boxes. These boxes are the very same boxes in which they were moved to this house. Because of this, I'll ask you to please excuse my scarred, dyed coffee table and the lack of pictures of my fabulous, extremely neat craft room. This is one reason I believe ANYONE can create crafty fabulousness. If I can manage a giant stash of ribbon and fabric in this house, everyone can find a place.

I've learned you can make something out of just about anything. My craft skills are minimal, meaning any project I post, you can absolutely do, too.

I'll be working on projects of about every sort you can imagine including kids' clothes, hair accessories, women's clothes, jewelry, and home decor.

I hope to see you around for my next post: a tutorial on adorable stretchy fabric headbands. (These were born out of necessity the night before my 7 year old's class pictures.)